Wall Cladding is an outer or inner layer fixed to a building’s walls. It can change appearance, add a degree of weather protection, and help manage heat or sound, depending on its design. It does not replace a sound wall structure or correct leaks by itself. Details matter.
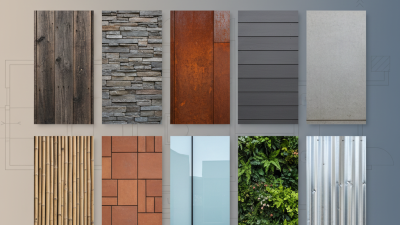
Materials create very different results. Timber brings visible grain and warmth, but may need regular sealing or repainting. Stone and brick offer weight and texture; they also require strong support and careful installation. Metal panels can create crisp lines and shed rain, while fiber-cement boards offer varied finishes with relatively low routine upkeep. Vinyl is light and often economical, though color, impact resistance, and performance differ by product.
Choosing cladding starts with the building, not a sample board. Local rainfall, freeze-thaw cycles, sun exposure, wall construction, and maintenance access all affect suitability. A coastal home, for example, may need corrosion-resistant fixings, while a shaded wall may stay damp longer. Check product data for fire performance, moisture control, warranty limits, and installation requirements; these vary by system and region. A small gap behind the panels can matter as much as the visible finish.
There is no single best option. Budget, appearance, durability, and repair needs can pull in different directions. Even attractive materials may disappoint when installed over a poorly prepared surface. This guide explains common Wall Cladding types, how they differ, and what to consider before choosing. Treat examples as starting points, then confirm details with qualified building professionals and the manufacturer’s instructions.
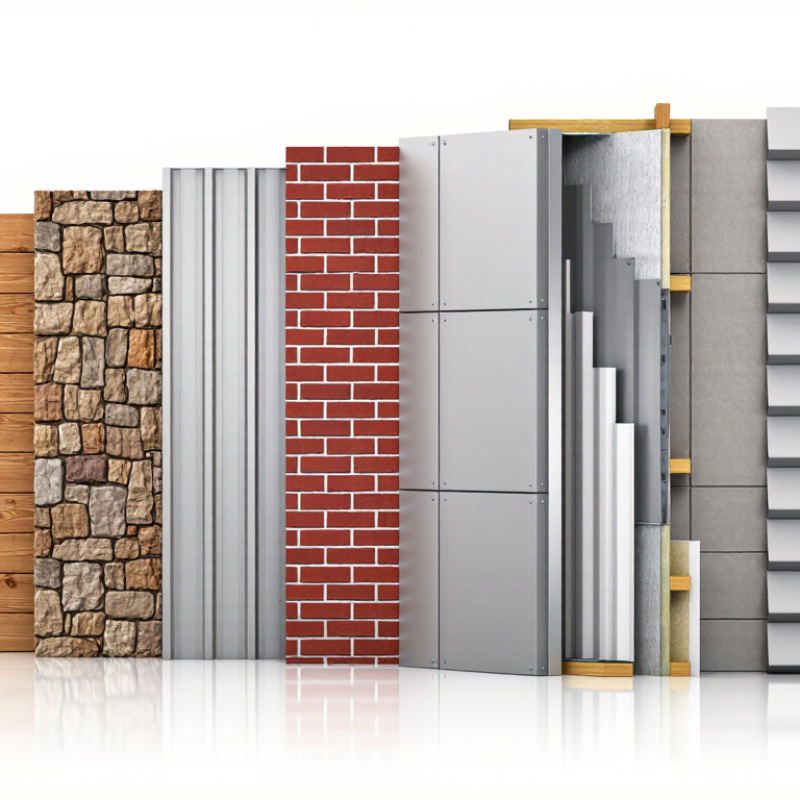
Wall cladding is an outer layer attached to a building’s walls. Common options include timber boards, metal panels, fiber-cement sheets, brick slips, and stone. Cladding helps shield the wall from rain, sunlight, and everyday knocks, while giving the building a distinct appearance. It is usually not the main structural wall. That distinction matters.
Cladding works as part of a wall assembly, not as a standalone waterproof guarantee. Panels or boards are fixed to a supporting frame or wall, with joints and edges detailed to manage water. In some systems, a small air gap behind the cladding lets moisture drain and the cavity dry. Fixings, flashing, and ventilation openings all affect performance. Poorly handled corners can let water reach the layers beneath. One detail is easy to underestimate: a neat-looking surface may still conceal a weak junction.
Tips: Check how water drains at windows, roof edges, and the wall base. Follow the material maker’s installation guidance, and ask a qualified building professional to assess the existing wall. Cladding may change heat and moisture behavior. The right solution depends on the building, exposure, and condition of its walls.

Wall cladding is an outer layer attached to a building’s walls. Its main job is to help shield the structure from rain, wind, sunlight, and everyday knocks. A well-designed system can direct water away from the wall, but cladding alone is not a guarantee against leaks. Behind it, drainage paths, joints, and flashing matter. Small gaps matter.
Cladding can also support thermal and acoustic performance. Some systems include insulation, helping reduce heat loss through the walls. Others help soften traffic noise, though results depend on the full wall assembly and careful installation. Materials behave differently: metal panels, timber, masonry, and fibre cement each have distinct maintenance needs. A shaded timber wall may weather differently from one exposed to strong afternoon sun.
Appearance is another function, but it is not only about style. Cladding can give an older façade a more consistent surface and protect vulnerable finishes from wear. Some systems may also contribute to fire performance when tested as part of a complete assembly; the material name alone is not enough to judge safety. It is easy to focus on the visible panels and overlook what sits behind them. That detail deserves attention. The right choice depends on local weather, wall design, upkeep, and the building’s intended use.
Wall cladding comes in several materials, each changing a building’s appearance, upkeep, and response to weather. Vinyl panels are lightweight and simple to clean, but cheaper products can look flat beside natural materials. Wood siding brings visible grain and warmth. It also needs regular attention, especially where rain hits or paint begins to peel. That upkeep is easy to underestimate. Fiber-cement boards can imitate painted timber and generally resist moisture and insects, though they are heavy and need careful installation.
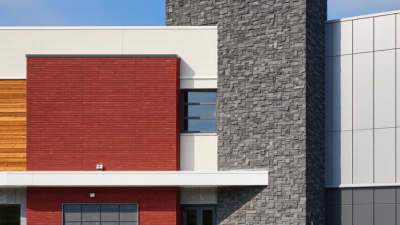
Brick and stone cladding create a solid, textured surface; some systems use thin veneers rather than full masonry. Metal panels, often steel or aluminum, suit crisp, modern designs, but scratches and heat exposure deserve consideration. Stucco forms a continuous finish with a quiet, matte look. It can be less forgiving if cracks or water entry go unnoticed. The right choice depends on climate, wall structure, budget, and the finish you can maintain. A shaded timber wall may weather differently from a sunlit one. Ask how water drains behind the cladding, not only how the outer face looks. That detail matters. A sample board can also appear different once it covers an entire wall.
Approximate service life in years. Each bar shows a typical range, not a guaranteed lifespan.
Actual performance depends on product quality, installation, climate, exposure, and maintenance. Brick veneer and natural stone can last longer than the ranges shown.
Wall cladding design begins with the wall, not the finish. Measure its height and width, then check for damp patches, loose render, and uneven areas. A straightedge can reveal dips that look invisible from across the room. These details affect the support system and the final alignment. They are easy to overlook.
Choose the cladding material for the room’s moisture, temperature, and cleaning needs. Then plan panel direction, joint spacing, corners, and openings around windows or sockets. Installation usually starts with a sound, level surface and accurately positioned battens or another suitable fixing system. Leave the clearances specified for the material, since some panels expand with temperature changes. Cut pieces with the correct tool, and test-fit them before fixing. A dry run saves trouble. Keep joints consistent, and check each row with a level. On one project, an old wall needed extra adjustment despite careful measuring. The first layout was not quite right, and revising it took time. Follow the material maker’s installation guidance, especially for wet areas, fire performance, and ventilation. When the substrate is damaged or the fixing method is uncertain, get an experienced installer to assess it.
| Cladding type | Typical form and thickness | Common fixing approach | Design and installation considerations | Common applications |
|---|---|---|---|---|
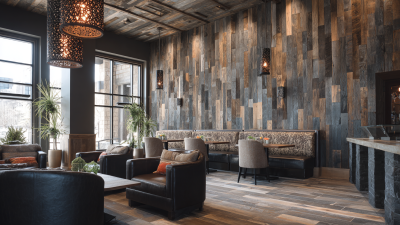
| Timber boards or panels | Solid or engineered boards, commonly around 15–25 mm thick; dimensions vary by profile and species. | Mechanically fixed to battens or a supporting frame, with suitable corrosion-resistant fixings. | Allow for movement and drainage; provide ventilation where the wall assembly requires it. Specify a suitable durable species or protective treatment, and plan for periodic maintenance. | Homes, extensions, feature walls, and low-rise buildings. |
| Fiber-cement panels or boards | Flat sheets or profiled boards, often around 6–12 mm thick, depending on the product and application. | Fixed to framing or a subframe with screws, rivets, or approved concealed systems. | Follow the specified joint widths, edge clearances, and cutting precautions. The supporting structure and fixing pattern must suit the panel size, wind loads, and manufacturer’s instructions. | Residential and commercial façades, soffits, and rainscreen systems. |
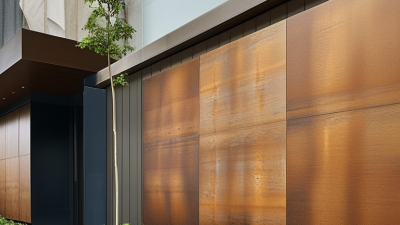
| Metal panels | Aluminum or steel sheet panels; face-sheet thickness commonly ranges from about 0.7–3 mm, depending on metal and panel system. | Attached with exposed or concealed mechanical fixings, often to rails or a subframe. | Allow for thermal expansion, manage joints and water run-off, and select compatible metals and fixings to reduce corrosion risk. Some panel systems incorporate a core; their fire performance must be checked for the intended use. | Commercial façades, industrial buildings, and architectural feature areas. |
| Brick slips | Thin masonry units, commonly about 15–25 mm thick, installed as a facing rather than a full brick wall. | Bonded to a prepared backing or installed as part of a proprietary carrier system; joints are typically filled with mortar or grout. | Use a stable, suitable backing and compatible adhesives or carrier components. Detail corners, openings, movement joints, and water management carefully. | Renovations, façades, internal feature walls, and lightweight masonry-style finishes. |
| Natural stone panels | Stone slabs or panels; façade pieces are often around 20–40 mm thick, with thickness determined by stone, size, support, and design. | Mechanically anchored, bonded in approved systems, or supported on a dedicated subframe, depending on panel weight and application. | Assess the stone’s strength, weight, moisture behavior, and fixing requirements. Large or heavy panels require engineered support and careful detailing at edges and openings. | Public buildings, commercial projects, and selected residential façades. |
| Ceramic or porcelain panels | Large-format façade panels are often approximately 8–12 mm thick, although system specifications vary. | Mechanically fixed to a subframe or installed with an approved adhesive system suited to the substrate and exposure. | Plan panel joints, movement accommodation, edge support, and replacement access. Confirm the system’s suitability for the building height, wind exposure, and local code requirements. | Contemporary residential, commercial, and institutional façades. |
| Vinyl siding | Lightweight interlocking profiles, commonly around 0.9–1.5 mm thick, depending on the product. | Nailed or screwed through slotted fixing holes to a suitable wall assembly, following the specified fastening details. | Do not fasten so tightly that panels cannot move; maintain required clearances at corners and openings. Provide appropriate flashing and drainage behind the siding. | Low-rise residential buildings and exterior remodeling. |
| Exterior render or stucco | A multi-layer coating applied to masonry or over a specified backing and reinforcement system; total thickness varies by assembly. | Applied directly to a compatible masonry base or over lath, sheathing, and reinforcement as specified. | Substrate preparation, reinforcement, control joints, curing, and weather protection are important. The assembly must manage moisture and suit the building’s movement and exposure. | Masonry façades and rendered wall systems on residential or commercial buildings. |
Design and installation sequence: Assess the substrate and exposure; select a cladding system; detail the support, insulation, cavity, flashing, and drainage as required; install the subframe and cladding to the system specification; then inspect fixings, joints, and water-shedding details. Dimensions and installation requirements vary by product, building design, and local codes.
Choosing exterior cladding starts with the building’s exposure, structure, and upkeep needs. Climate matters more than appearance alone. In wet areas, drained cavities and well-detailed joints help water escape instead of lingering behind panels. Wood can offer a warm finish, but it may need more frequent coating. Metal and fibre-cement can suit different conditions, yet their fixings and edges still need careful detailing. No option is effortless.
Ask how the cladding handles local wind, sun, rain, and temperature changes. Also check its weight against the supporting wall and confirm that installation meets local building requirements. Maintenance starts with regular visual checks, especially around windows, corners, and the base of the wall. After storms, look for loose panels, cracked sealant, or water stains indoors. Clear leaves promptly. Keep drainage openings free of debris, and follow the material maker’s cleaning guidance rather than using harsh cleaners by default. For wood, watch for peeling finish and soft spots; for masonry, note new cracks or crumbling mortar. A yearly inspection is useful, though it will not catch every hidden problem. If damage keeps returning, investigate the cause before simply patching the surface.